In this article, Acronis Backup Agent for a Windows Server is used as an example for capturing the steps for downloading and installing the Acronis backup agent.
Note: You need to install a backup agent on each machine (device) that you want to back up.
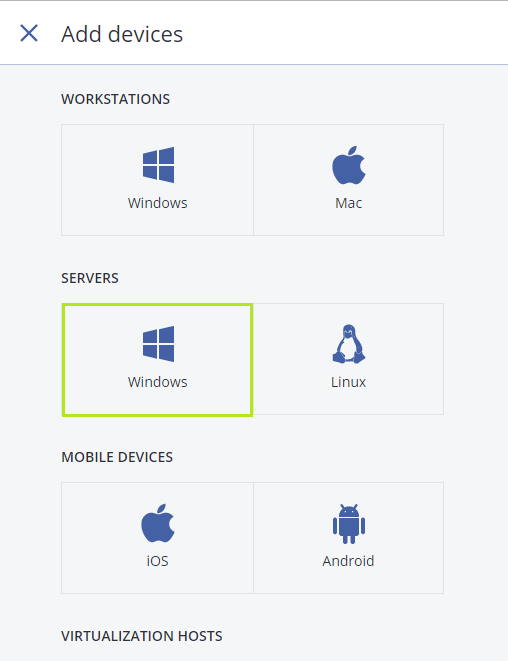
1. Download Acronis Backup agent:
- Open https://backup.cloudacropolis.com/
- Log into the Acronis portal using your login username, and click the "Continue" button. Then enter your password and click the "Sign In" button.

- In the Acronis dashboard, click the "Add" button located on the top right side.

- Depending on the machine and data you want to back up, select and download the respective installation file. In this picture, we choose Windows server agent.
2. Installing the Acronis backup agent:
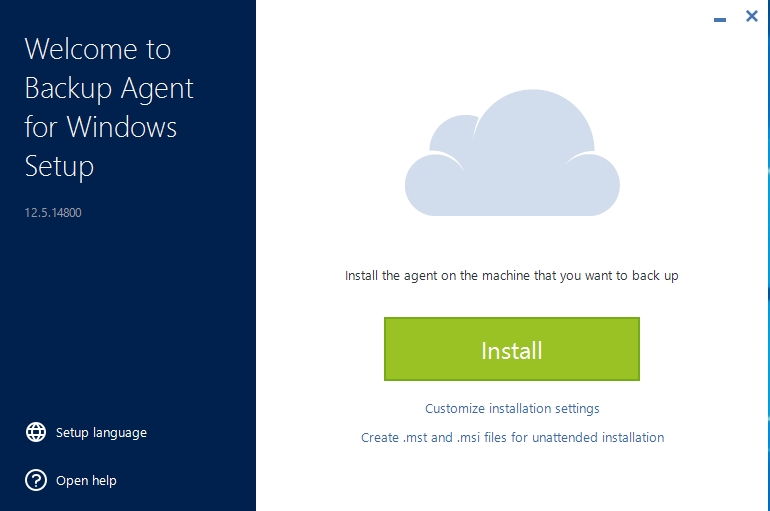
- Windows Server:
- Run the installation file and confirm that you want to run the file by clicking on the Run button. Then click on Install.
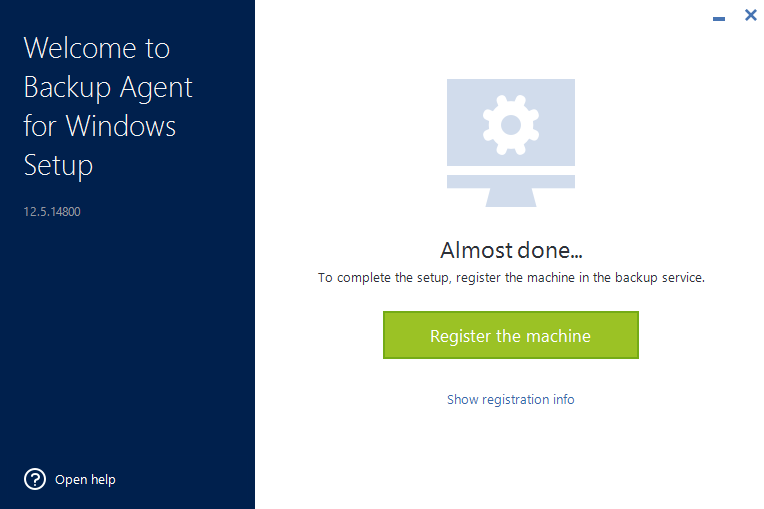
- After installation, it requests you to register the machine. Click on Show registration info.
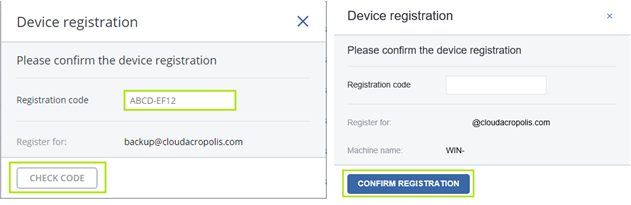
- Open your Acronis Portal, Click on ADD at the top right. Scroll down under Registration via code click on register.
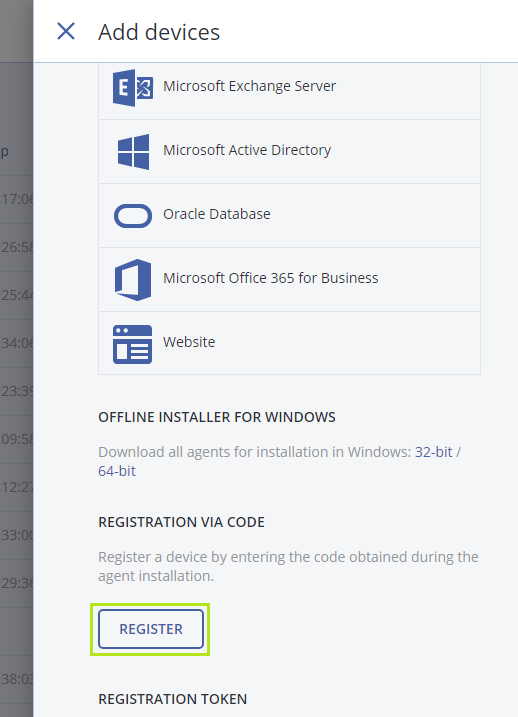
- Enter the Registration Code and confirm the machine registration.
- Once the backup agent is installed, the device you selected to backup will display in the backup portal.
